Cause Verification – hosted form implementation
The hosted setup for your nonprofit discount program enables you to have it set up in no time and with barely any engineering resource.
You will be able to quickly have your branded discount program live and start onboarding nonprofits to your product.
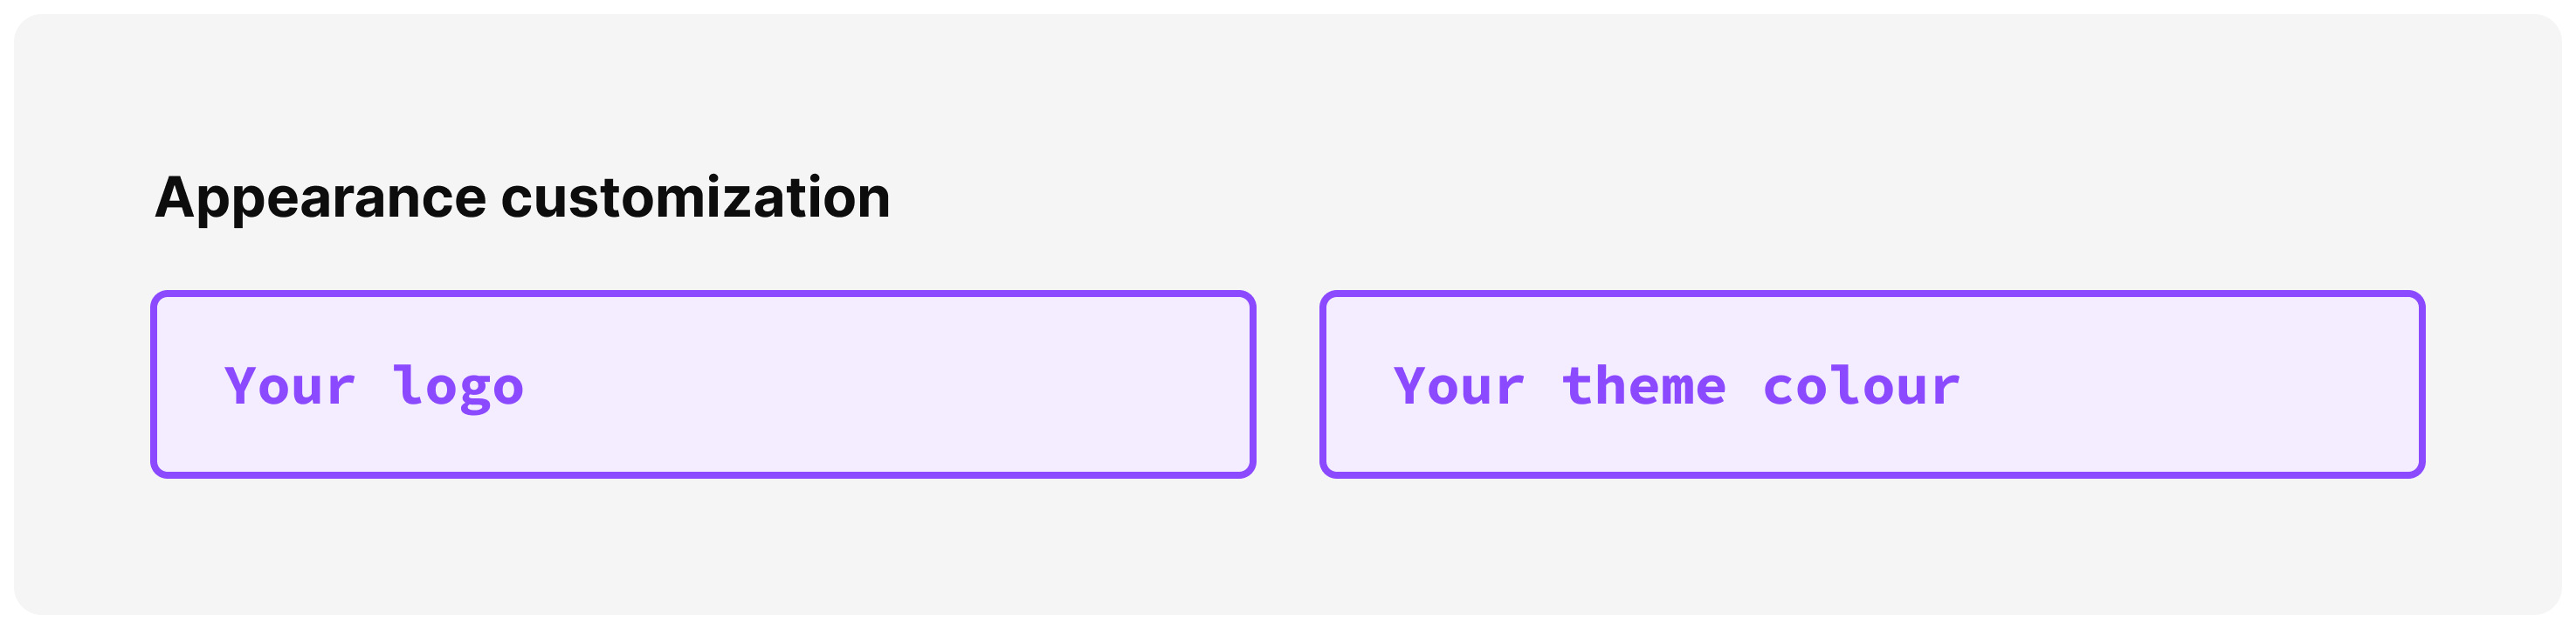
Below you can see a summary of what you can customize:
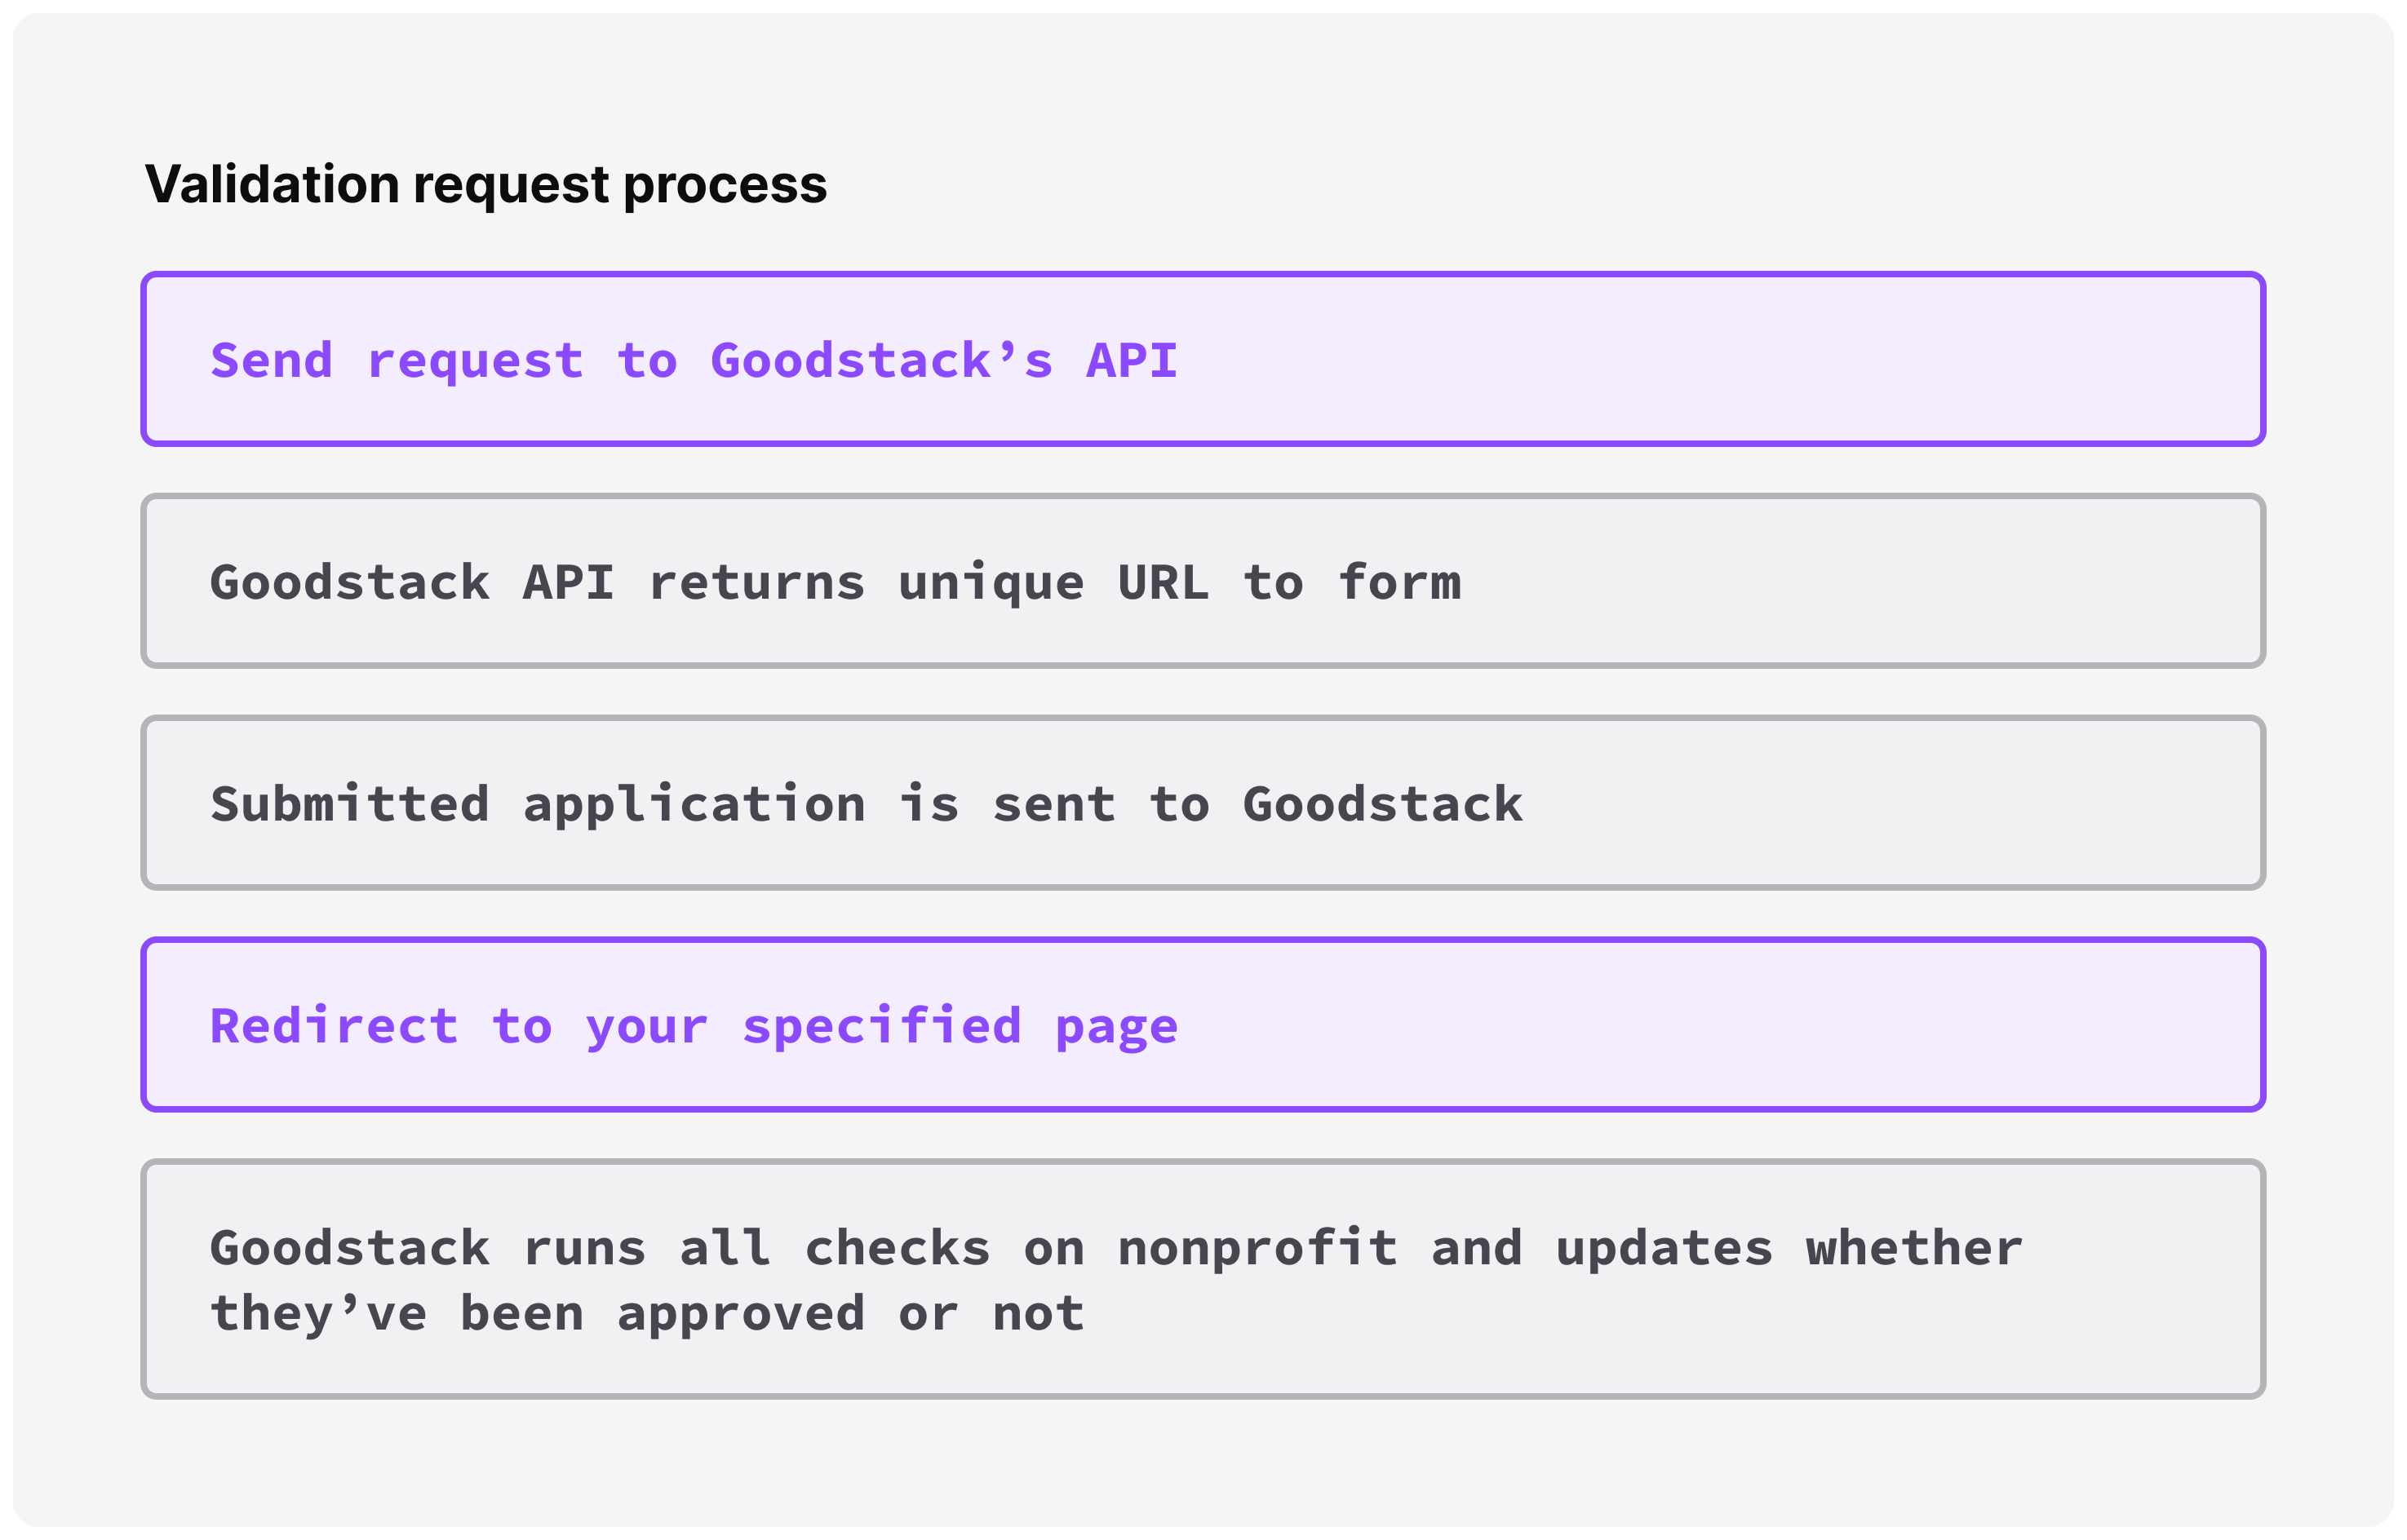
And the process for hosted applications:
1: Customize the hosted application form
You can customize the look and feel of the hosted form. To do this you need to provide us:
- A logo or icon that will be displayed on the form. For best results, we recommend that your logo is a square image larger than 128 x 128 pixels. JPG, JPEG and PNG file types are supported.
- A CSS hex colour value representing the primary branding colour for the hosted form e.g.
#EB3434
2: Implement the hosted application form
It takes ~2h to set up the nonprofit validation hosted setup
Add an endpoint on your server that creates a validation invite. A validation invite is a one off invitation to complete a validation submission. To do this you will need to make a POST request to Goodstack’s API.
Create a validation invite
Configure a validation invite
Validation Invites have the following parameters that you can use for one time validations.
redirectUrl→ URL that the hosted form redirects to after the flow is completed.metadata→ an object that you can use to attach key-value data to the Validation Invite.
Example response
You will then be returned a response matching the format of the example below:
{
  "data": {
    "id": "validationinvite_xxxxxxxxxxxxxxxxxxxxxxxxxxxxx",
    "status": "open",
    "metadata": {
      "key1": "value1",
      "key2": "value2"
    },
    "language": "en-GB",
    "redirectUrl": "https://example.com/finish",
    "url": "https://validation.goodstack.org/validate/validationinvite_xxxxxxxxxxxxxxxxxxxxxxxxxxxxx?token=asasjhd",
    "createdAt": "2020-10-13T17:46:54.000Z",
    "expiresAt": "2020-10-20T17:46:54.000Z"
  },
  "object": "validation_invite"
}
After creating the Validation Invite, direct your user to the URL for the hosted form returned in the response.
3: Receive and process results
To receive results, you'll need the Webhook Subscriptions API.
When users submit your hosted form, you'll to be able to process the results for each check. For that, you can subscribe to notifications by creating webhook subscriptions using the Create a Webhook Subscription endpoint. For the hosted form, you will need to subscribe to at least the events:
validation_submission.createdvalidation_submission.succeededvalidation_submission.failed
Before subscribing you will need to create server-side event handlers. You can verify that the incoming webhook notification is sent by Goodstack by following the instructions here.
This will update you when you receive new applications and when a final outcome is reached.
You may also wish to subscribe to updates for the individual verification checks if you want to track more granular status updates in your system.
You are encouraged to process webhooks as quickly as possible and return a successful response as soon as you have verified the webhook and stored it for processing. You could use a queue to store the incoming events and process asynchronously. If the webhook handler responds too slowly, this could lead to a timeout and a retry of the webhook event.