Donations hosted gateway setup
The Goodstack Hosted Donation Gateway enables you to create a branded donation experience in your product, using only a few lines of code.
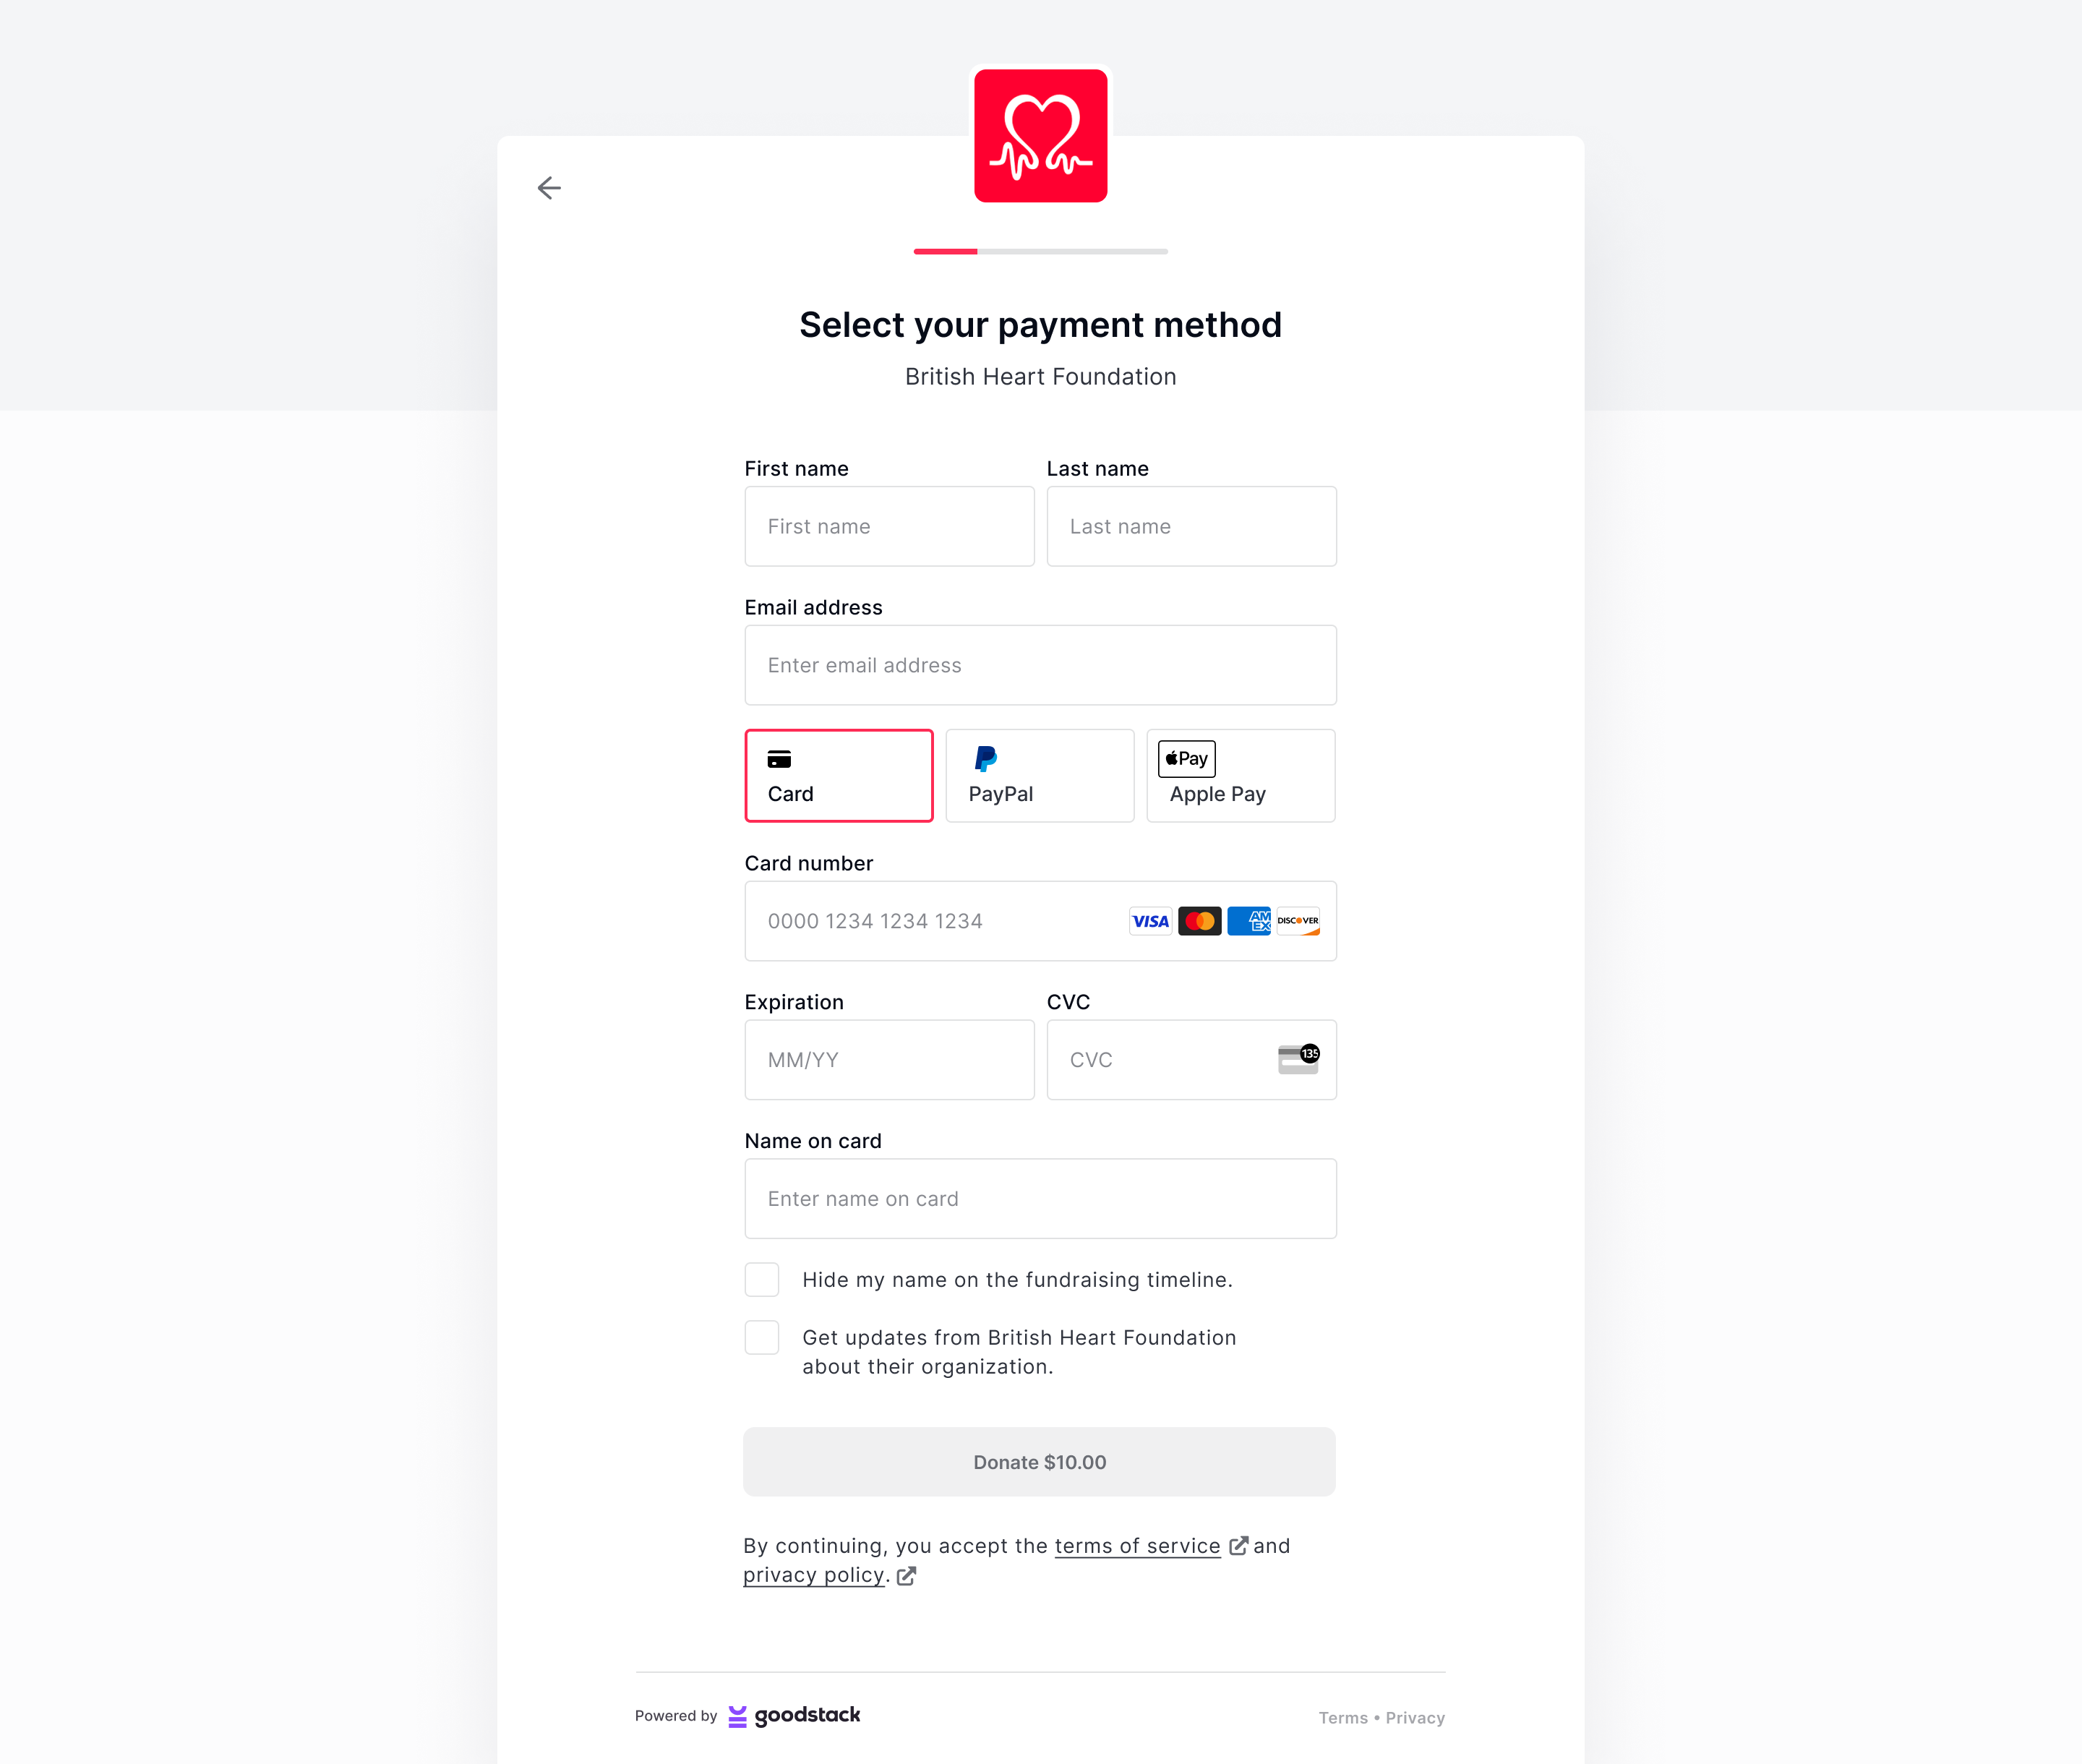
Once live, your users can easily and efficiently donate to the nonprofit of their choice whilst feeling like they’re in your application.
You’ll be able to customize the following:

Here’s a summary of how the hosted donation flow will work:
- Create a new Donation Session through Goodstack's API
- Goodstack API returns unique URL to a hosted donation screen
- Donation is submitted with user's donation amount and payment details
- Users are redirected to your application
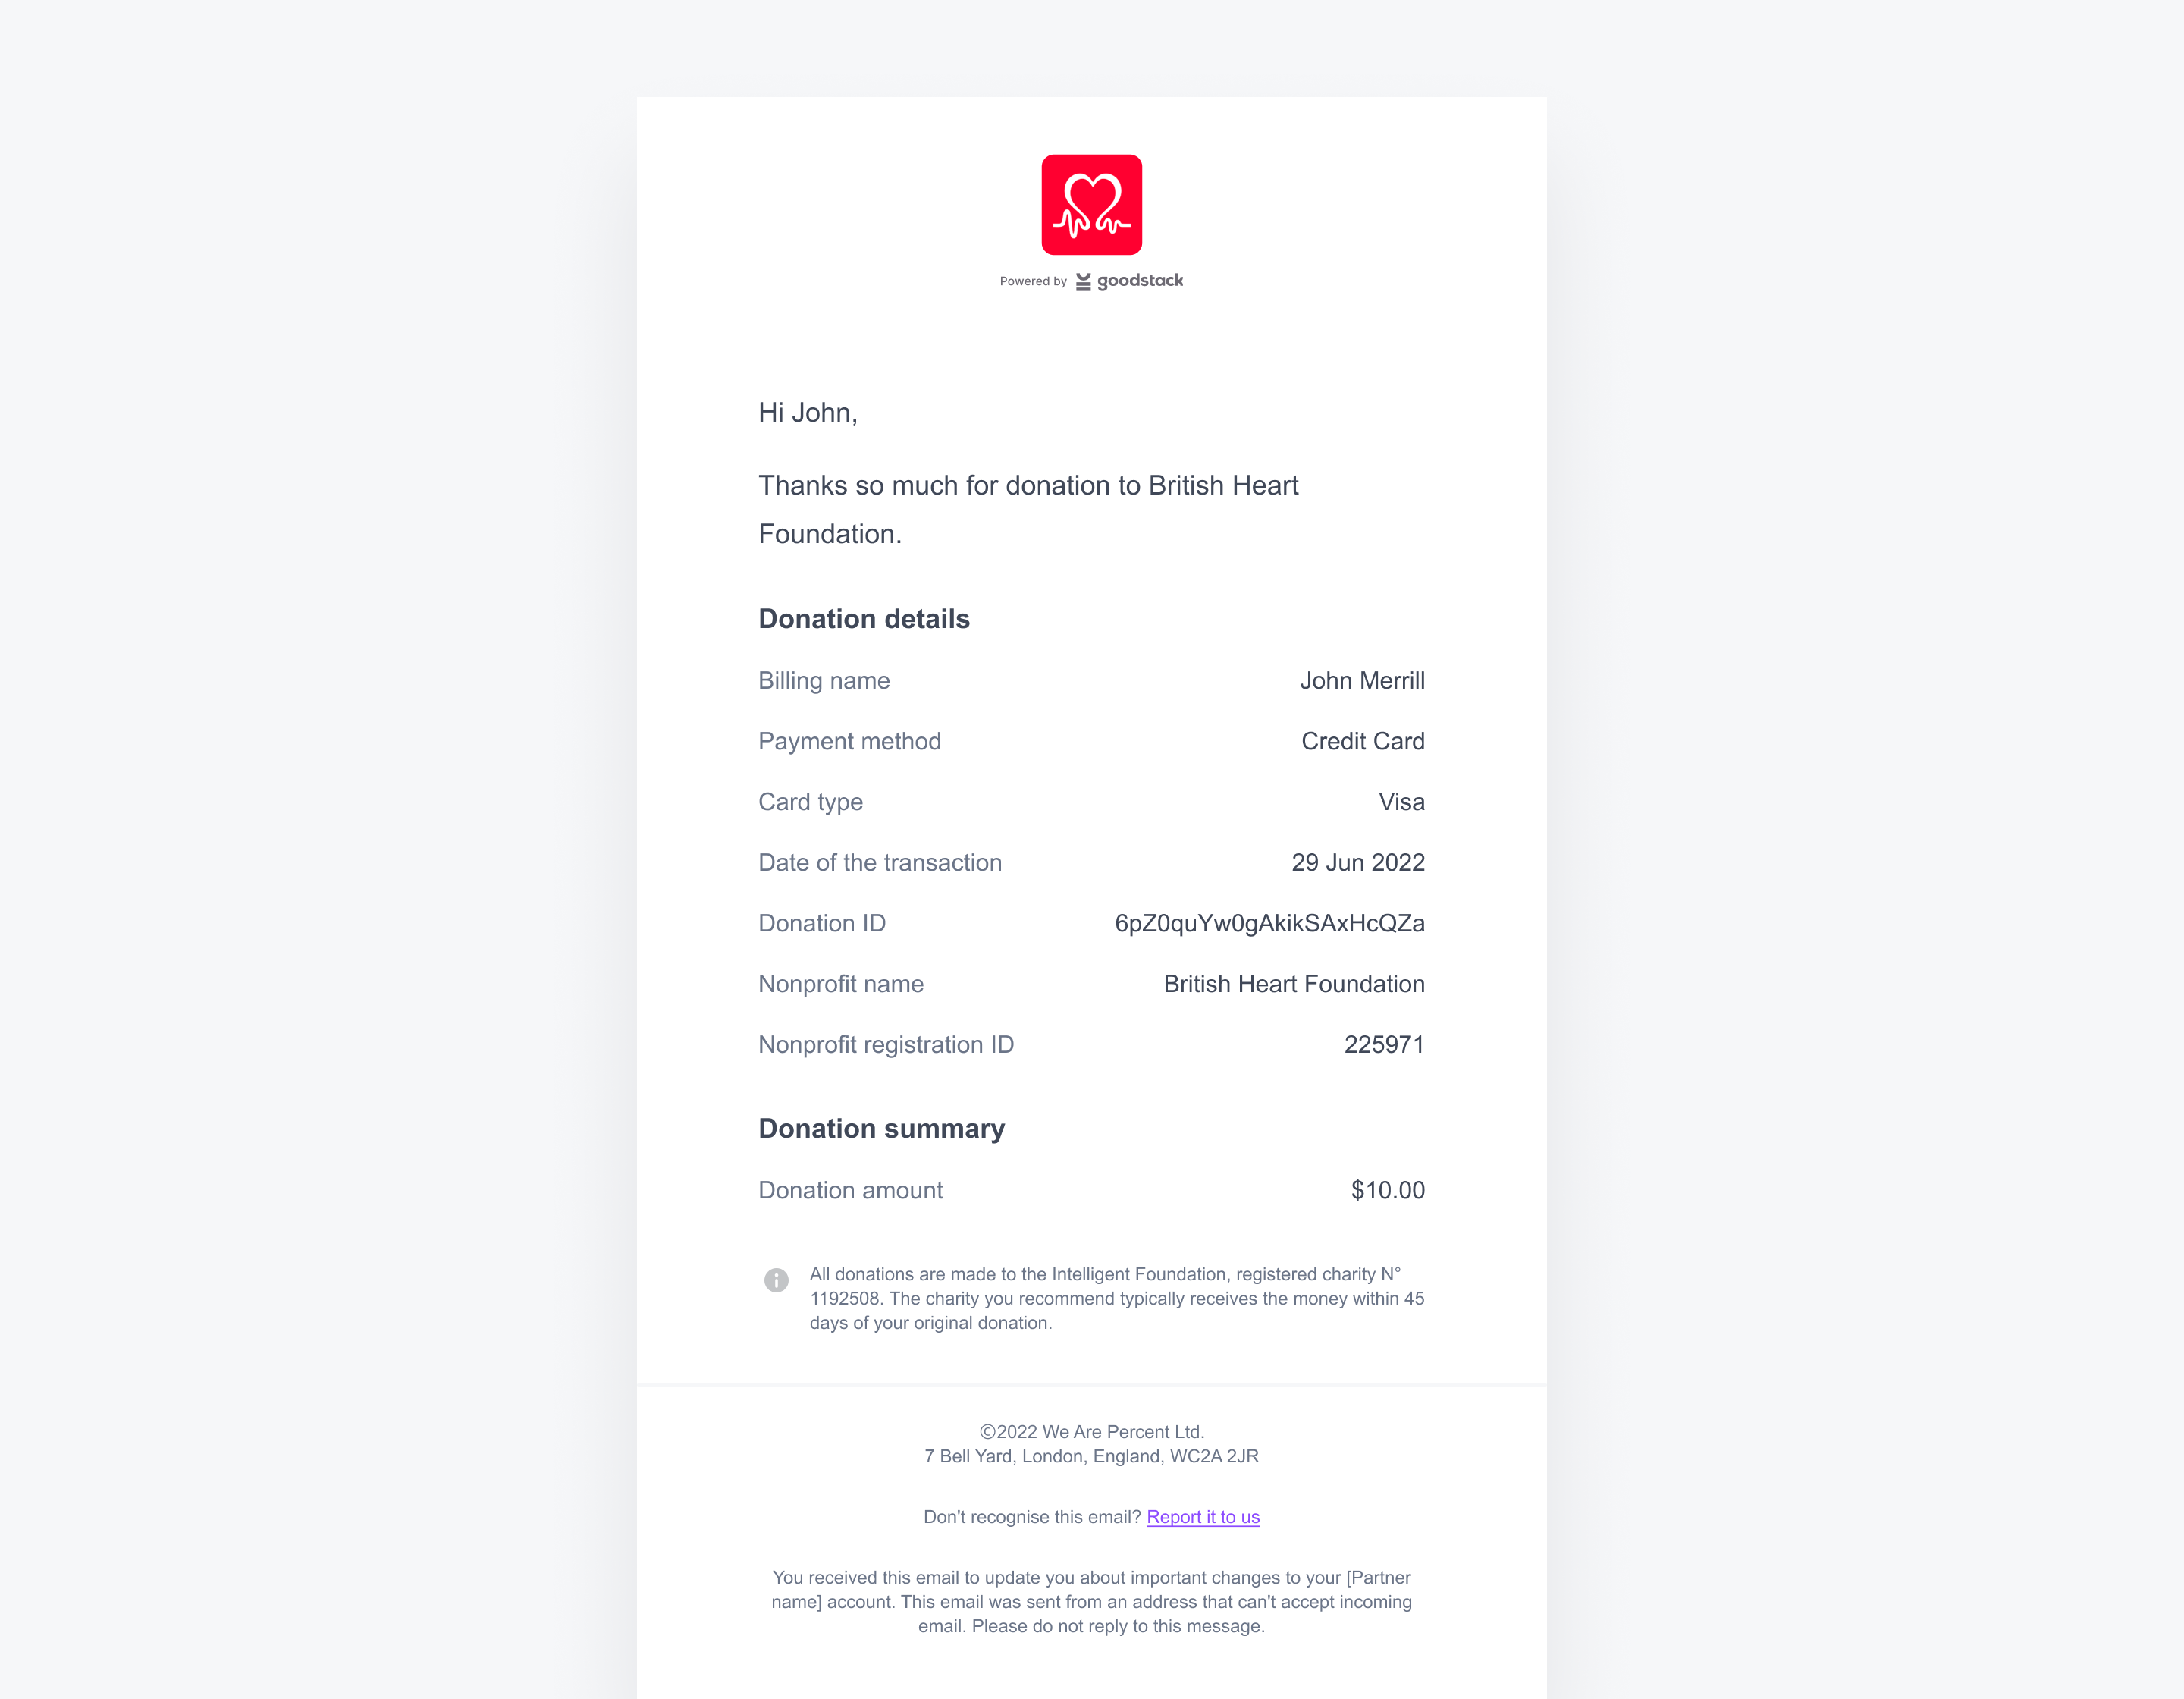
- Users will receive a donation receipt via email
Implementation process
1. Get your API keys
Get in touch with our product & engineering team to get access to the dashboard: engineering-support@goodstack.io
Before you start your implementation, you’ll need access to the dashboard to retrieve your Goodstack API keys.
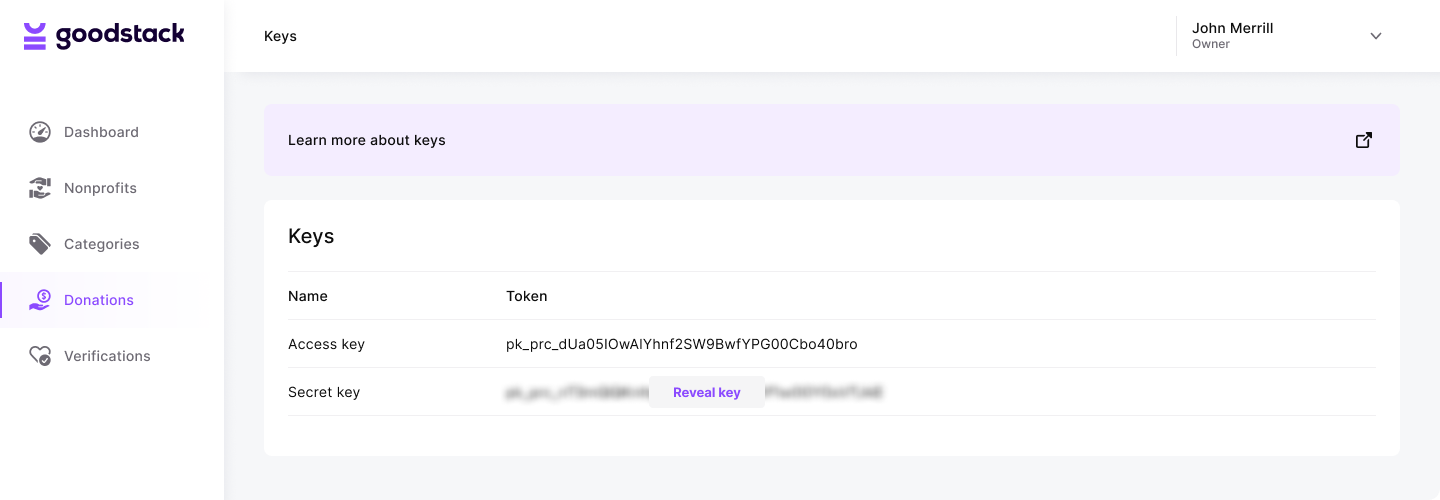
Go to the Keys page in your Partner dashboard to access your Publishable Key as well as your Secret Key.

Authenticate your API requests by using these API keys in the request header.
The secret key should be used for server to server requests and the publishable key for requests via your front end to any public API services.
Header parameter name: Authorization
Please do not publish your private key in repos or use anywhere in front end.
2: Customize the Hosted Donation Gateway
You can customize the look and feel of the Hosted Donation Gateway:
- A CSS hex colour value representing the primary branding colour for the hosted form e.g.
#EB3434 - A logo or icon that will be displayed on the form, in the event that we don’t have a logo for the non profit. For best results, we recommend that your logo is a square image larger than 128 x 128 pixels. JPG, JPEG and PNG file types are supported.
You can’t currently customize this yourself (we’re working on it) but in the meantime you can share these with your account manager or send to engineering-support@goodstack.io.

3: Implement the hosted donation gateway
It takes ~2h to set up the hosted donation gateway
Add or update an endpoint on your server to create a donation session using the Create A Donation Session API using your secret API key.
A donation session represents your user’s session as they donate to a nonprofit. We recommend creating a new donation session each time your user attempts to donate.
Donation session lifecycle
The donation session object may enter the following statuses:
open→ the donation session object will be in anopenstatus after creationcompleted→ after a donation is successfully made by the user the status of the donation session object will transition tocompletedexpired→ if no donation is completed before theexpiresAttime the status will be expired. TheexpiresAttime is 24 hour after creation after which the user will be unable to complete a session and users loading the donation session will see a message saying the session is expired
Create a donation session
To create a donation session you must supply the organisationId of the nonprofit you want your user to be able to donate to.
To get the organisationId you can use the Search Organisations API, either to build a search experience for your users or to find the nonprofits you want your users to donate to and manually add them to your application.
The nonprofit search API can be filtered by:
- Country using the
countryCodeparameter - Nonprofit name using the
queryparameter
Donation sessions can be created with the following optional parameters:
userId→ to track donations against one of your users, you may create a user using the Users API. Store theuserIdagainst your user and send this through when creating a donation session.successUrl→ URL that the hosted form redirects to after the flow is completed. If this is not provided a success screen will be displayed to the user after a successful donation.currency→ to set the currency that the payment will be taken in. If this is not provided then the currency will be set based on the user’s location if the language is supported, or it will default to USD.language→ to set the preferred language for us to present the form in. If this is not provided then the language will be set based on the user’s location if the language is supported, or it will default to English.
POST https://api.goodstack.io/v1/donation-sessions
Authorization: Secret Key
Content-Type: application/json

{
	"organisationId": "organisation_000000C8xMwmi4C4aoTi6C5FJv0Po",
	"userId": "user_000000CQkBwyHXpzEIP6u9DQkMFTE",
	"successUrl": "https://example.com/donation-completed"
}
Example response
You will receive a response matching the format of the example below.
{
  "data": {
    "id": "donationsession_000000CQkA3eOP0pRQowOVpXnktcm",
    "status": "open",
		"organisationId": "organisation_000000C8xMwmi4C4aoTi6C5FJv0Po"
		"userId": "user_000000CQkBwyHXpzEIP6u9DQkMFTE",
    "language": "en-GB",
    "successUrl": "https://example.com/donation-completed",
    "url": "https://donate.goodstack.io/donation-session/donationsession_000000CQkA3eOP0pRQowOVpXnktcm?token=krniofea...mkl",
    "createdAt": "2022-03-12T13:46:54.000Z",
    "expiresAt": "2022-03-12T14:46:54.000Z"
  },
  "object": "donation_session"
}
After creating the donation session, direct your user to the url for the hosted donation gateway returned in the response. Your user will receive an email receipt after a successful donation.

4. Track donations & donation sessions
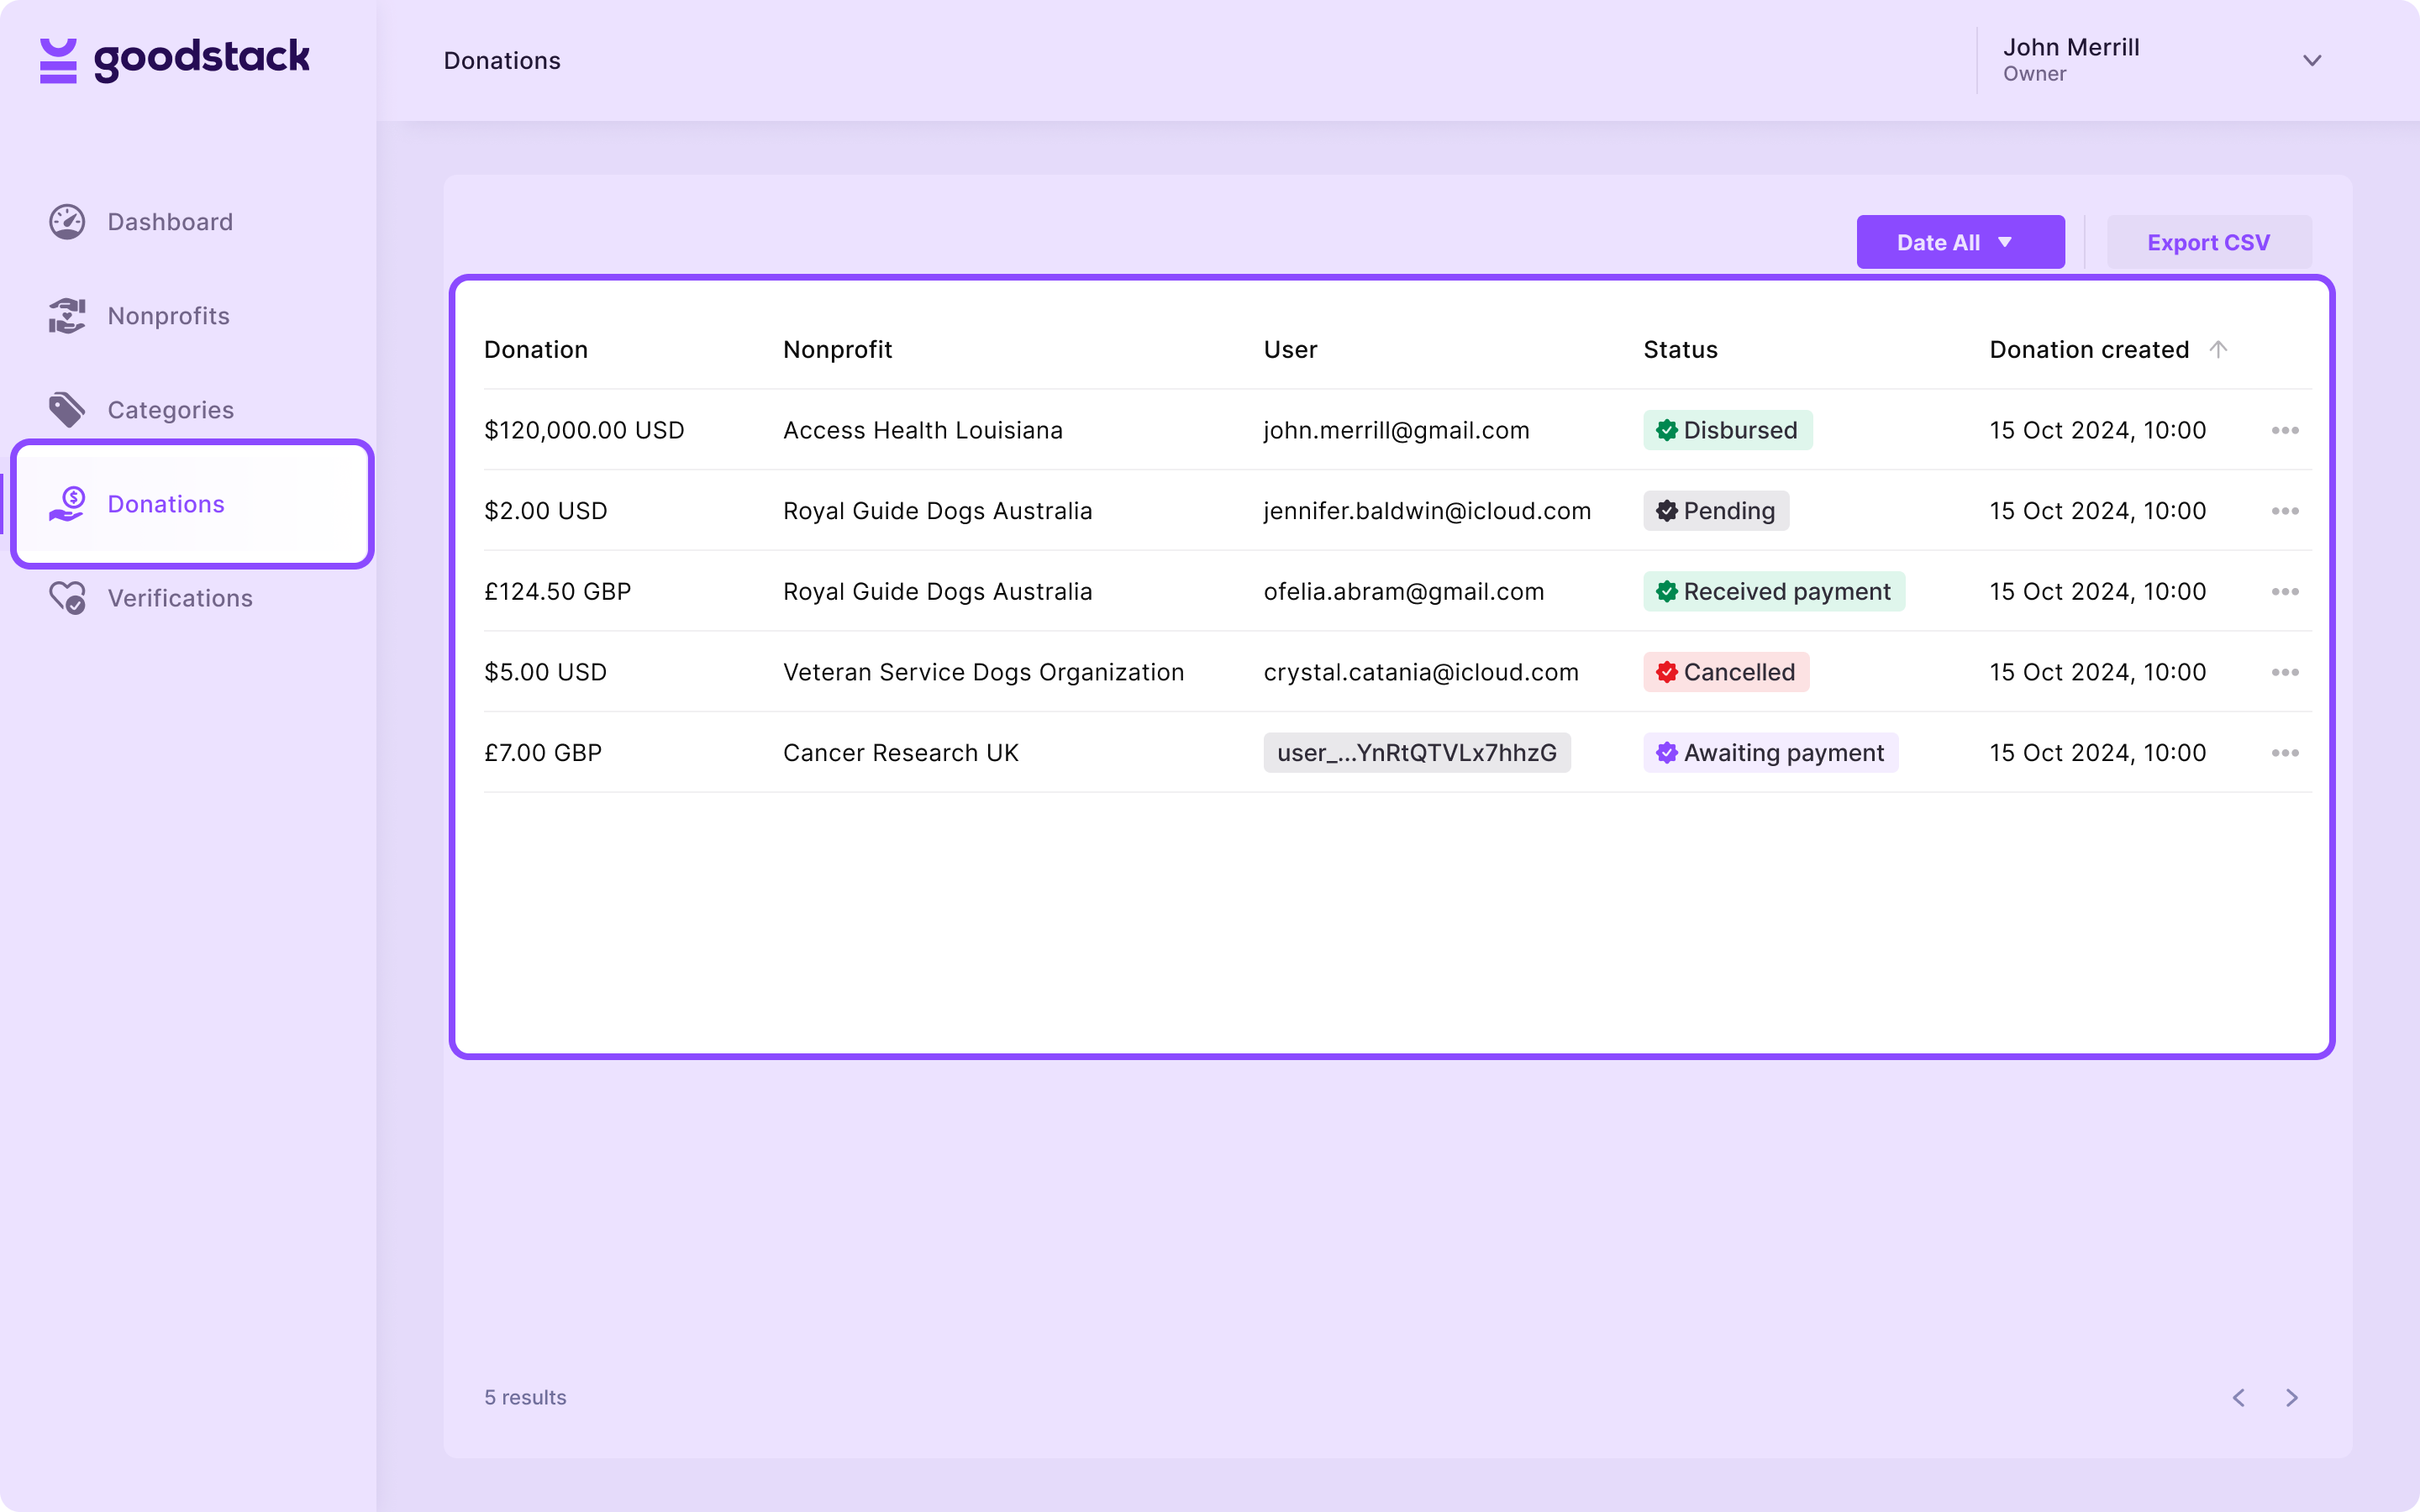
You can view and retrieve donations either in your dashboard (see image below), or using the Donations API. You can also receive updates on the outcome of a donation session by subscribing to webhooks.

You can query for Donations by userId and filter by date. The Donation object tracks the lifecycle of a donation.
Donations created from Donation Sessions will be of type hosted. The Donation object also contains the following fields that are collected from the user as they successfully donate via the Hosted Donation Gateway:
firstName→ user’s first namelastName→ user’s last nameemail→ user’s emailconsentedToBeContactedByOrg→ whether the user consented to be contacted by the benefitting organizationanonymous→ whether the user wants to share their donation publicly or not
For a full reference see Donations API.
Donation lifecycle
Donations of type hosted may enter the following statuses:
REQUESTED_PAYMENT→ user has submitted a donation amount and we are waiting for the payment to be completedRECEIVED_PAYMENT→ the payment has been completedDISBURSED→ the donation has been successfully paid out to the nonprofitCANCELLED→ if the user abandoned the session after submitting a donation amount, the donation will be automatically cancelled after 24 hours
Webhooks
To receive information about the outcome of a donation in real time, you can subscribe to our webhooks service.
POST https://api.goodstack.io/v1/webhook-subscriptions
Authorization: Secret Key
Content-Type: application/json

{
  "events": [
    "donation.hosted.payment_received"
  ],
  "url": "https://your.endpoint.com/webhooks"
}
Once payment is received for a donation, we will submit a POST request to your designated webhook URL to inform you of the event.
The event type will be donation.hosted.payment_received and the object will contain information about the donation. For a full reference see Goodstack webhooks.
5. Test your integration
You can use the details on the pages below to test your integration. Use the nonprofit details for testing nonprofit search or creating donation sessions and the test card details for testing donations.